If you’ve been opening up booster packs from the new Sword & Shield—Lost Origin expansion, you’ve probably found some very cool cards. But look a little closer—you might also have the makings of some awesome decks to try out. While you’re not likely to see these decks make the top cut at your next Regional Championships, you still might find that these cards are just as fun to play with as they are to look at.
We challenged three Pokémon TCG experts to choose one of these cards and create a deck that would be a lot of fun to play, and perhaps even good enough to win a few matches against your friends. What we got were three fascinating decks, all distinct in how they work. Plus, we asked them to comment on each other’s decks just to hear what they had to say!
Stéphane Ivanoff: Delphox V Deck

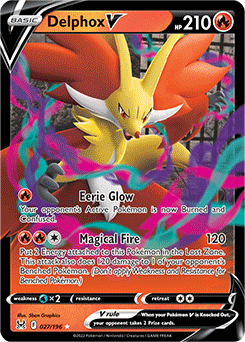
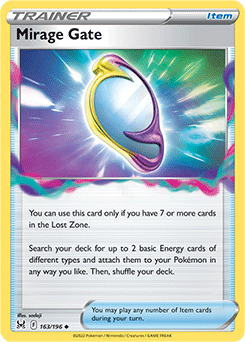
Building a deck around Delphox V is a case study on how to exploit the Lost Zone mechanic featured in the Sword & Shield—Lost Origin expansion. Delphox V’s powerful Magical Fire attack can Knock Out two Pokémon at once. You can also use it to Knock Out useful support Pokémon like Bibarel or Drizzile on your opponent’s Bench to disrupt their strategy. However, it has two main downsides—a fairly hefty Energy cost and a requirement that you put Energy in the Lost Zone when attacking, which makes it harder to use Magical Fire several times in a row. Fortunately, both of these issues are solved by the Mirage Gate Item card: if you can put at least 7 cards in the Lost Zone, you can accelerate more Energy to Delphox V directly from the deck.
In order to put cards in the Lost Zone in the first place, you’ll need two cards: Colress’s Experiment and Comfey (with the Flower Selecting Ability). Both cards let you add to your hand at the cost of putting cards in the Lost Zone, which is actually a benefit in this deck. This means that every turn or so, you’ll need to make choices about which resources to keep in hand and which to get rid of to power up Mirage Gate.
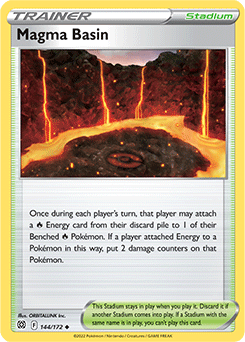
Even using Scoop Up Net and other switch effects that allow you to move several Comfey in and out of the Active Spot in order to use Flower Selecting multiple times each turn, it takes a few turns to get to 7 cards in the Lost Zone. That’s where Cramorant comes in—you only need 4 cards in the Lost Zone to use its Spit Innocently attack for zero Energy. That means you get to do significant damage for free, sometimes even on the first turn. Meanwhile, you can attach your Energy to a Benched Delphox V in preparation for Magical Fire. With the Magma Basin Stadium card, it only takes two turns to get your first Delphox V ready to attack, as long as you manage to discard 1 Fire Energy (usually with Quick Ball).
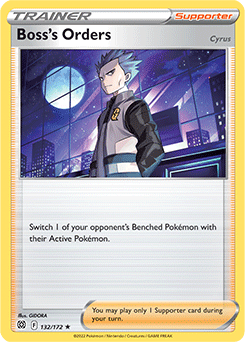
There is one more threat to the Magical Fire strategy: the popular Manaphy. It prevents attack damage done to the Bench, so if your opponent plays it, you’ll miss out on the additional 120 damage. In other words, you’d only be attacking at half power. If you play Delphox V, be prepared to deal with Manaphy! One option is to Knock it Out with Cramorant by playing Boss’s Orders.
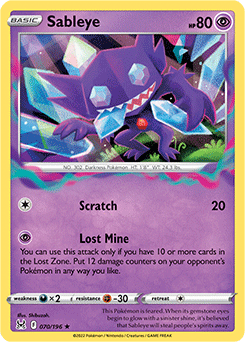
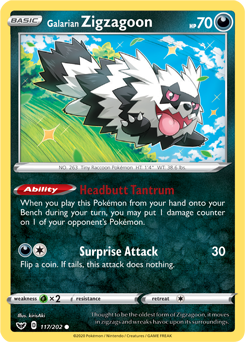
There’s a second option: use Sableye, whose Lost Mine attack puts damage counters on your opponent’s Pokémon. Since placing damage counters directly is not the same thing as doing damage, you can use Lost Mine to put seven damage counters on Manaphy for a Knock Out. Then, put the five remaining damage counters on other Pokémon to set them up for a KO. For example, if your opponent plays the 130-HP Radiant Greninja, you can put one damage counter on it so that you can take the Knock Out on the next turn with the 120 Bench damage done by Magical Fire. Galarian Zigzagoon can also be used to help set up these kinds of KOs, and it has synergy with Scoop Up Net too.
With that in mind, here’s the list I’ve built:
When it comes to Lost Zone decks, you can never make your deck too consistent. Comfey and Colress’s Experiment require you to put cards in the Lost Zone, so it’s crucial to play additional copies of your most important cards in case you lose one or two. That’s why I chose not to play some of the more interesting, situational cards such as Echoing Horn and include a third copy of both Delphox V and Cramorant instead.
There’s one Pokémon that you can play only one copy of, though: Radiant Charizard, who is the perfect complement to Delphox V’s game plan. Taking KOs off low-HP Pokémon can be effective, but similar strategies often struggle to close out games because taking the last Prizes can be hard when the opponent has no low-HP Pokémon left on the board. Thankfully, Radiant Charizard can help to prevent that struggle, even in the late game. It can usually attack for a single Energy, but unlike the other Pokémon in the deck, Radiant Charizard can also hit a single target for massive damage. With a Choice Belt, it can even KO any Pokémon VSTAR with a single attack!
Tord Says:
I love the flexibility of the damage output in this deck. Attacking with Delphox V and Sableye in particular means very little damage is wasted: Sableye can either set up the math perfectly for Delphox V in advance or finish off the damaged targets afterwards. The choice of engine is further complemented by the Energy acceleration provided in Mirage Gate, which is needed for relatively costly attackers like Delphox V. Being a spread deck, however, it also has the disadvantage of being weak against high-HP Pokémon, especially those that can heal. Radiant Charizard solves that problem beautifully, and it already shares typing with the main attacker Delphox V. Overall, it’s a well-rounded list that could play a fair match against most decks.
Ross Says:
Stéphane’s Delphox V deck includes some very powerful late-game options between Mirage Gate, Radiant Charizard, and Sableye. What I find most intriguing is the speed it should have. With several switch effects available, it seems very plausible to me that the deck could not only pull off a very quick Cramorant attack, but also get an Energy on Delphox V right away, threatening a quick Magical Fire with the help of Magma Basin the following turn. Many decks can either hit for fast (possibly turn 1) damage or prepare for a big attack on the next turn, but this deck could possibly do both. Overall, the deck has strong early- and late-game plans, which should really put constant pressure on opponents.
Tord Reklev: Hisuian Arcanine Deck

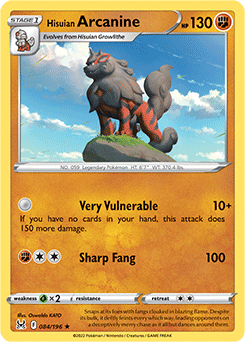
Hisuian Arcanine is a card from the new Sword & Shield—Lost Origin expansion that caught my eye. Its Very Vulnerable attack can do an impressive 160 damage for zero Energy, but only under the condition that your hand is completely empty. It’s a fitting attack name, as under normal circumstances it would indeed leave the player very vulnerable. Given Hisuian Arcanine’s low HP, it’s unrealistic to tank a hit, making it crucial that we can replace this Pokémon consistently.
After some trial and error, I settled on the following list:
You’ve probably already noticed something unusual about this list: the total lack of Energy cards. I wanted to take maximum advantage of Very Vulnerable when building the deck, so I filled the space where Energy cards would go with consistency cards.
The strategy in this deck is simple but effective: attack with Hisuian Arcanine (or Mightyena) every turn starting from turn 2. The damage output of 160 per turn should be enough to Knock Out most single-Prize Pokémon and two-hit KO most Pokémon VSTAR or VMAX. Hisuian Arcanine should theoretically be trading even (or better) on Prize cards against most Pokémon while still being relatively easy to replenish thanks to the lack of Energy cost.
Let’s dive into the build and explain the card choices that would best support this strategy.
Support Cards
With its Sunny Bloom Ability, Radiant Venusaur is the perfect fit for Hisuian Arcanine—the cards are only drawn after the attack. This ensures that on the following turn, the deck will have a hand to work with that can continue the setup and stream of attackers. It’s important to note that if the player scores a KO, the Prize cards will be taken first, and then Sunny Bloom will activate.
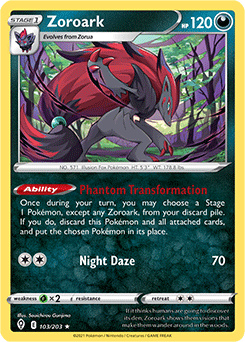
Since our main attacker is a Stage 1 Pokémon, Zoroark from Sword & Shield—Evolving Skies becomes a natural inclusion. With its Phantom Transformation Ability, Zoroark can remove Hisuian Arcanine from the discard pile and put it back into play. This makes it much easier to replace Hisuian Arcanine throughout the game.
Emptying the Hand

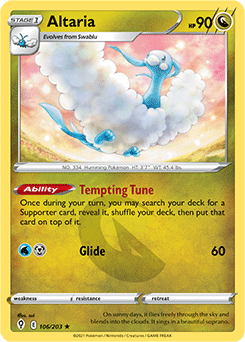
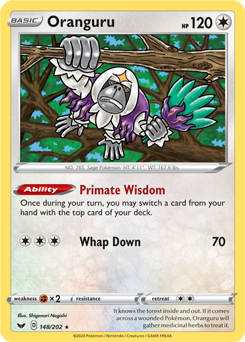
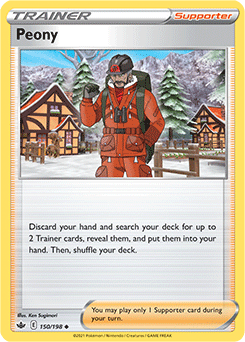
Let’s tackle the main goal of the deck: achieving a zero-card hand every turn. There are a couple different ways of accomplishing this—using either Ultra Ball or Quick Ball is popular—but the easiest way usually involves Peony. Playing Peony lets us discard our entire hand and search out any two Trainer cards. You will often find yourself searching for Level Ball and Evolution Incense to replace Hisuian Arcanine, but Peony can of course be used for anything else you find helpful. To make it easier to find it, we play a combination of Altaria from Sword & Shield—Evolving Skies and Oranguru from Sword & Shield. Altaria’s Tempting Tune Ability puts your desired Supporter card on top of the deck, and Oranguru’s Primate Wisdom Ability can then put it into your hand.
Another cute trick the deck has available is the Supporter card Grant. On top of giving Hisuian Arcanine extra damage output, it also synergizes perfectly by letting you discard 2 cards from your hand. This will effectively discard 1 card, as Grant will be added to the hand itself and then played or discarded. Grant is very helpful indeed in reaching zero cards in the turns in which Peony is not the preferred option.
Tech Cards
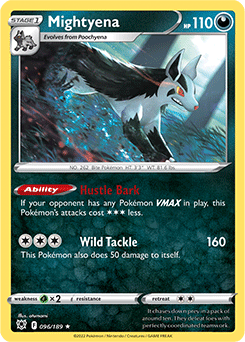
Mightyena from Sword & Shield—Astral Radiance is included in the list to give you a better way of combating Mew VMAX—when Mew VMAX is in play, Mightyena can attack for zero Energy with its Hustle Bark Ability. Thanks to Zoroark, Poochyena is not needed either.
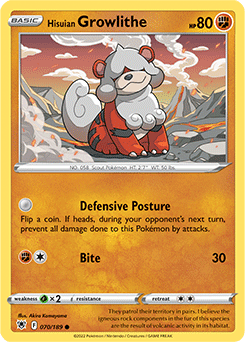
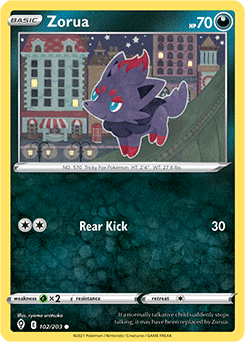
Manaphy helps block off sniping attacks like Radiant Greninja’s Moonlight Shuriken attack. Altaria’s 90 HP makes it a prime target, along with Hisuian Growlithe, Swablu, and Zorua.
Hisuian Arcanine Tips and Tricks
Here’s a quick roundup of some useful techniques when playing this deck.
-
Sometimes it can be better to not use the Sunny Bloom Ability. Avoiding it could prevent your opponent from disrupting the top card of the deck with a Marnie; doing so could also be useful when you are struggling to empty your hand completely because you have too many cards.
-
Oranguru’s Primate Wisdom Ability can be used to preserve important cards for later, so consider swapping the most valuable card in your hand before an eventual discard.
-
Don’t use Zoroark’s Ability until you need to. Leaving it in play as a Zoroark lets you be flexible when your opponent is targeting the Altaria.
-
Use Scoop Up Net against clever opponents who might try to set up additional Knock Outs with Rapid Strike Inteleon’s Quick Shooting Ability.
I always enjoy decks that function differently, so I find playing Hisuian Arcanine to be extremely satisfying. With a little bit of imagination, there are a ton of cards that have the potential to star in viable decks. Consider trying out Hisuian Arcanine for yourself—it’s just one of many ways you can build a deck around your favorite card!
Stéphane Says:
One thing that differentiates Tord from other top players is how much he values consistency in a deck. His Hisuian Arcanine deck plays no fewer than 21 Pokémon-searching Item cards! That’s a lot, and it pretty much guarantees that his deck can accomplish its core strategy every game.
I’m also happy to see that Radiant Venusaur found a spot in this deck. Historically, Venusaur has been overshadowed by Blastoise and Charizard in the Pokémon TCG. I’m glad to see my favorite of the three Kanto first partner Pokémon find a niche for itself!
Ross Says:
What I like about Tord’s Hisuian Arcanine deck is how much control it should have in maintaining attacks turn after turn. The problem with attacks like Very Vulnerable (or Granbull’s All Out attack from Sun & Moon—Lost Thunder) was that you could get stuck with just one card you couldn’t play, which meant you would effectively miss your attack for the turn. Between Altaria, Oranguru, and Peony—and the option of using Grant from your discard pile—the deck has several ways of manipulating what cards are in your hand and finding the line of play to get your 160 damage every turn. The deck also naturally bypasses a typical weakness of Zoroark, which is that you have to discard Energy (or anything else) attached to it to use Phantom Transformation. With no Energy, there’s no problem!
Ross Cawthon: Radiant Steelix Deck
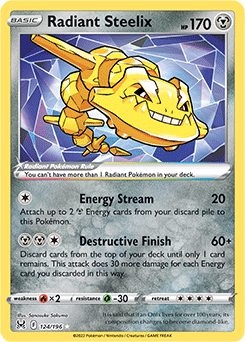
Steelix has been a special Pokémon to me ever since I played the Neo Genesis version in my first World Championships. Radiant Steelix is certainly an interesting card. The damage potential of Radiant Steelix’s Destructive Finish attack is enormous, but the cost is equally immense—you lose your entire deck! How can you make a gameplan when, by design, you get rid of all your resources and put yourself effectively one turn away from losing?
The first choice to make for Radiant Steelix is what you will use to attack with after discarding nearly your whole deck. Volcarona V’s Surging Flames attack is perfect: it shuffles all the basic Energy you just discarded back into your deck for big damage, thus avoiding deck out. If you can swap back and forth between Radiant Steelix and Volcarona V, you have the potential to alternate between massive attacks. (Hisuian Basculegion from Sword & Shield—Lost Origin could also fill Volcarona V’s role, but I found using a Basic Pokémon gave the deck more space.)
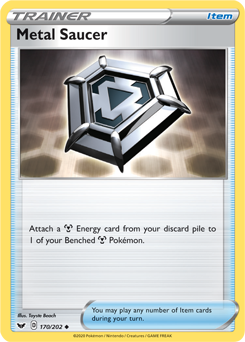
The next challenge is resources. Your Volcarona V and almost everything else in your deck is going to be in the discard pile after Destructive Finish. Because of this, you need cards that take resources out of the discard pile. Banette from Sword & Shield—Lost Origin is perfect, as its Puppet Offering Ability gives you back a Supporter from the discard pile. If you can get a couple Banette into play or into your hand before using Destructive Finish, you will be able to pick out any Supporter you need for the following two turns. Plus, you won’t have to worry about the Supporter you need still being in the deck—your deck will have zero cards! The other card I decided to use for resource recovery was Darkrai VSTAR. Its Star Abyss VSTAR Ability gets back 2 items from the discard pile. You will typically use the Ability to retrieve Metal Saucer, although you have other options as well. If you discard Darkrai VSTAR with Destructive Finish, you can use Banette to get the Supporter Klara and recover your Darkrai VSTAR.
Here is the full list:
This deck is focused on making three or four huge attacks. In practice, the first two are pretty easy to pull off, but the third can be a challenge.
Step 1: Get several Banette into your hand or on the board, and power up Radiant Steelix to use Destructive Finish. This can happen pretty quickly (typically by Turn 2 or 3) with help of Metal Saucer.
Step 2: Use Klara to find Volcarona V and Fire Energy, then attack with Surging Flames. As long as you have a Banette in play, you can find Klara.
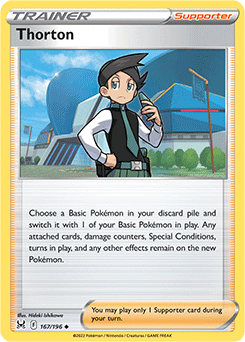
If your opponent tries to be clever by not attacking you after Step 1 (leaving your Radiant Steelix in the Active Spot and you possibly in a position to deck out), you can instead use Banette to get the new Sword & Shield—Lost Origin Supporter Thorton. Then, just swap out the Radiant Steelix for the Volcarona V in your discard pile. To keep this play open, I often attach one Fire Energy to Radiant Steelix.
Step 3: This is the most difficult part. Now that your deck is full of Energy, you want to pull off a second Radiant Steelix attack. The ideal play is to use Klara again, perhaps via Banette, and get Radiant Steelix and Darkrai VSTAR. Next, use Darkrai VSTAR’s Star Abyss to get two Metal Saucer, and then attack again with Radiant Steelix. Since Volcarona V just shuffled all your Energy in, you will also need a way to discard 2 Metal Energy. It’s likely that you’ll still have some Quick Balls, Ultra Balls, or Trekking Shoes left in your hand that can do just that. Alternatively, if you have a Metal Energy still in play, you can discard it to a Retreat Cost, then use Banette’s Ability from the Active Spot to provide a “switch” effect afterwards.

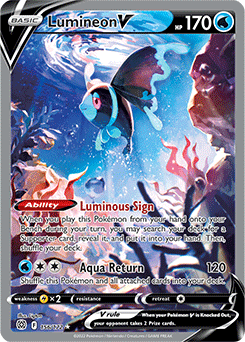
Another possibility: instead of Knocking Out your Volcarona V, your opponent uses Boss’s Orders and Knocks Out Darkrai VSTAR or a Banette. If you have one Metal Saucer remaining, you can use Thorton to exchange Volcarona V for Radiant Steelix, use one Metal Saucer, and then attack. Similarly, it can be helpful to put a single Energy on a Crobat V or Lumineon V early in the game so that Thorton plays are available if needed.
Step 4: If needed, you can use Volcarona V again with another Klara.
Air Balloons are there to help you pivot to Radiant Steelix quickly. Most of the other cards should be self-explanatory. I went with 19 Energy after testing various numbers. With 19, you hit 300 damage pretty consistently on the first Radiant Steelix attack; getting that much damage afterward is even easier. The rest of the cards are for setup.
A couple of other cards you may want to consider: Pumpkaboo can get rid of Path to the Peak, and it can be found by Klara, too. Grant can help you get those needed Energy discards in Step 3.
Give this deck a try, and enjoy the thrill of discarding (nearly) your whole deck at once!
Stéphane Says:
I’m very impressed by the creativity at play in Ross’s Radiant Steelix deck. Radiant Steelix is a truly unique card with incredible potential on paper, but you can’t just fit it in any deck. You definitely need to base your whole strategy around it. Pairing it with Banette to recover discarded Supporter cards and Darkrai VSTAR to recover Item cards is, in my opinion, incredibly smart. Decks with a unique game plan like this one are sometimes easier to counter because they lack versatility, but they’re also some of the most fun to play!
Tord Says:
Some of the most fun moments in the Pokémon Trading Card Game occur when someone brings a unique strategy and takes people by surprise. This Radiant Steelix deck is sure to have the opponents’ jaws dropping to the floor, as the entire deck is discarded in spectacular fashion for an incredible KO. The inclusion of Banette and Darkrai VSTAR to recycle resources is brilliant, and it makes the juggling between Radiant Steelix and Volcarona V possible. I also appreciate that Ross included alternative strategies against clever opponents who try to take advantage of how the deck works. I can also see this deck being strong against multi-Prize attackers, such as Pokémon VSTAR and VMAX decks.
There you have it—three incredible decks conjured up from the Sword & Shield—Lost Origin expansion that you can try against your friends, at your next live event, or on the Pokémon TCG Online. Be sure to experiment with your own ideas to find more ways to turn your favorite cards into powerful decks!
For more Pokémon TCG strategy and tips, visit Pokemon.com/Strategy.

Stéphane Ivanoff is a contributing writer for Pokemon.com. A longtime Pokémon fan, he has played the Pokémon TCG competitively since 2010 and is a former National Champion, seven-time Worlds competitor, and the 2018 and 2019 North America International Champion in the Masters Division. He studied mathematics and has a degree in Probability and Statistics, but he says that doesn't help his game as much as you'd think! You can follow him on X @lubyllule.

Tord Reklev is a contributing writer for Pokemon.com. He is a longtime player from Norway, playing the game since he was 6 years old. In becoming Champion at the 2022 Latin America International Championships, Tord is the first player to win all four International Championships and complete the Grand Slam. Outside of the game, he is a student and enjoys playing tennis. You can find him at most big events and can follow him on X at @TordReklev.

Ross Cawthon is a longtime player, starting to play tournaments in 2000. He is the only player to compete in all 20 Pokémon TCG World Championships, finishing as a finalist in 2005 and 2011, and a semifinalist in 2016. He is known for creating many new “rogue” decks over the years. Ross has a Ph.D. in astrophysics and studies dark energy (not to be confused with Darkness Energy cards).

